Feature:
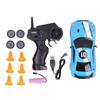
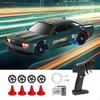
1. 1/76 Scale super small remote control car, lightweight and easy to carry, do not take up space.
2. DIY detachable car shell add more fun for you. Steering/driving in a tight space, highly simulation appearance and exquisite workmanship.
3. Simulation rubber tires, LED headlights. Type?C interface USB cable for convenient charging, 40min using time and 30min charging time.
4. 2.4G frequency allows multiple players to play against each other at the same time without interference.
5. With the functions of forward, backward, left/right turn, LED headlight and tail light, two?wheel drive, special designed for children above 8 years old playing.
Specification:
Item Type: RC Car
Material: Plastic + Electronic Components
Scale: 1/76
Suitable Age: 8 +
Power System Motor: Brushed motor transmitter
Model: 91803G-B
Frequency: 2.4G
Channel: 3CH
Remote Control Range: Approx. 30m / 98.4ft
Remote Control Battery: 4 AAA batteries(not included)
Car Battery: 75mAh 3.7V lithium ion battery
Charging Time: About 30 minutes
Battery Life: About 40 minutes
Tilt Angle: 30 degrees
Net Weight: 13 g / 0.5 oz(approx.)
Car Size: Approx. 5 x 2 x 2cm / 2 x 0.8 x 0.8in (+/-1-2cm)
Remote Control Size: Approx. 13.7 x 16.2 x 6.8cm / 5.4 x 6.4 x 2.7in (+/-1-2cm)
Functions: Forward, backward, left/right turn, proportional throttle and steering, LED headlights and taillights, two-wheel drive
Instructions:
Function Settings: If it is found that the handwheel is in the middle position, the driving direction of the model is deviated, the direction fine-tuning shortcut key can be used to correct the problem; if it is found that the trigger is in the middle position, the driving direction of the model is deviated, the throttle fine-tuning shortcut key can be used to correct the problem
REV adjustment:
1. Stretch ST to the left or right, press REV for about 5 seconds to reverse adjust ST direction;TH pull forward to the end or back to the end does not move, press REV for about 5 seconds to reverse adjustment of TH direction;
2.CH3 self-locking mode (press the REV button for 0.5s under normal startup mode, and the buzzer will sound for a long time) means the switch is successful.
3.CH3 is in non-self-locking mode (press the REV button for 0.5s under normal startup mode, and the buzzer will sound briefly), indicating successful switching.
1. Steering wheel: control left/right
2. Throttle trigger: controls forward/backward braking/neutral
3. Handle: Used to hold the transmitter.
4. Antenna: Send a signal to a receiver located in the vehicle.
5. Power switch: Turn on/off the transmitter.
6. Disassembly button: The handle is removable.
7.ST to the maximum left, ST to the maximum right, press TRIM+, TRIM1- button to adjust ST angle to increase or decrease to the maximum extent.
8.TH pull forward to the end or back to the end does not move, press REV for about 5 seconds to reverse adjustment of TH direction.
Remove handle and install:
1. Press and hold the button
2. Remove handle
3. Press the button to install the handle
Battery installation use AAA batteries or Ni-MH battery, when the voltage is less than 4.5 V0.2, buzzer continue ringing, LED should start flashing.
1. Remove the battery cover from the remote control.
2. Insert four new AAA batteries (Not included) according to the polarity marks on the battery holder.
3. Reinstall the battery cover. Warning: Do not try to charge non-rechargeable batteries, or it will cause an explosion.
Warning: Please remove the battery when not use, otherwise it will burn the circuit board.
Connector:
1. Steering servo (channel 1)
2. Throttle servo (channel 2)
3. Channel 3 Servo (Channel 3)
4.AUX(Channel 4) Connect the external batteryWarning: Do not connect batteries with voltages higher than 6.0V to the receiver, or it will damage the electronic equipment.
Receiver installation and connection
Device:
In order to achieve the full operating range of the radio system, the receiver antenna must be intact and properly installed.
It should have as many vertical antennas as possible.
The end of the antenna shall be included in the antenna tube.
Installation:
Make sure there are no kinks in the antenna or antenna tube.Do not fold the end of the antenna onto the tube. This will reduce the operating range of the system and damage the antenna.
Ensure that the receiver is securely installed or fitted to the receiver to prevent severe impact.
The transmitter is paired with the receiver
1. Power on the receiver.Press the SW key.The receiver"s LED flashes quickly.
Turn on the transmitter
3. When the LED light on the receiver turns from flashing dry to regular bright, it means the signal between the transmitter and the receiver is connected.
Note: Radio System Setup has been bound.This process is necessary only if a new transmitter or receiver is installed
Control protection function settings
Pull the TH trigger forward or backward to the position desired by the user, and keep it still. Press the receiver SW button for about 2 seconds and the LED light flashes quickly for 5 seconds.Release the SW button and then release the TH trigger to turn off the transmitter power switch.
The throttle channel of the receiver will enter the position of runaway protection.
Safety information
1. Please do not use this product at night or in thunderstorm weather, bad weather environment may cause the remote control device failure.
2. Do not operate this product when you feel tired, uncomfortable, or after ingesting alcohol or taking drugs that cause anesthesia or excitement.Failure to do so could cause serious injury to the device or others.
3. Make sure the battery has enough battery power before operation.
4. Stay away from children.
5. To prevent corrosion, remove the battery from the transmitter if it will be stored for more than a week.
Maintenance:
1. Use a clean, dry cloth or soft brush to clean equipment.
2. Do not use chemical cleaners as they may damage sensitive electronics and plastics..
Package List:
1 x Car Toy 1 x Remote Control 1 x Remote Control Handle 1 x USB Cable 2 x Protective Guard 1 x Coding Needle 1 x Manual